
I begin the painting process by making a block-in drawing that describes linear boundaries of information on the cast. Making a block-in for a painting is no different than creating a block-in for a drawing except that with the added difficulty of changing areas of wet and dry paint the consequences of adjusting mistakes in the block-in while painting can be more severe. So I pay close attention to specificity in the shapes while blocking-in.

The relationship between the block-in and modeling is symbiotic. The block-in holds the modeling like the shell of an egg. As a result, the modeling can never become more dimensional than the shape it is confined to.
Knowing that the shapes of the block-in may become slightly adjusted during the painting process I usually leave the lines in my block-ins with a slight width to make the transferred drawing on the linen easier to interpret. With a slight width in line I also can have the opportunity to view the form boundaries as existing somewhere within that thickness of line, which gives me flexibility to determine the final shape of each form through form analysis. This flexibility in the lines of the block-in is helpful for me because, it can be difficult to model form while being confined to the rigid boundaries of a block-in that was not completed with as in-depth form analysis that takes place during the modeling process.
Value Study

Before approaching the actual painting I create a small value study to use as an aid in managing the large relationships on the form while I later model the form in small sections. The value study acts as a map for the value range in the cast. By referencing the relationships in the value study I can gain a better sense of which area of my value range I should be in while working on individual parts of the cast
Underpainting

The block-in is transferred to the painting surface using an oil transfer. This process is described on Doug Flynt's blog here. After the block-in is transferred to the surface of the linen that I paint on, Art Fix, I complete an under-painting using paint thinned with odorless mineral spirits. The under-painting provides coverage of the light value of the surface to create a layer that is more similar to the final values of the form painting. If parts of the final form painting are thinner, the under-painting that is similar in value will show through instead of the light color of the ground.
I personally have preferred to keep the under-painting in a looser state to be able to clearly isolate the gradations of my modeling to make it easier for me to evaluate. I have tried working on under-paintings that were closer in value and handling to the final form pass and struggled with evaluating the gradations as I painted because the final pass was so similar to the values of the under-painting. Although, I imagine if I had a stronger ability to retain the conception of the overall form this difficulty of isolating each parts gradation would not be such a struggle. For me, the gradation is one the most difficult aspects of form to describe in suggesting the three dimensionality form. Since I am still developing in comprehending form, I find it easier to retain the conception of one slice of a form at a time that I can easily evaluate. I currently have found it easier to manage modeling form by building the relationship of forms through focusing on developing them in smaller strip like sections at first.
Modeling Form

For me, it easier to distinguish the modeling from the looser under-painting as if the form is a shell. I often even imagine running my finger underneath the strip of form that I create in my paintings to see if it feels like the form should bulge out in certain areas to make the fullness of form closer to the roundness of form on the actual cast.
I create gradations in paint by dabbing a progression of values next to each other. In areas of form that contain a broader planes I lean towards applying larger strokes of paint instead of smaller dabs. My goal is to place small sections of value that are progressively lighter than the preceding stroke to suggest a subtle turning of form toward the light. For each strip I often begin at the shadow and slowly crawl up the hill of form one slight change in value at a time to create a gradation that suggests the curvature of form on the cast. I try to use thick enough paint that shows a solid value of paint with each stroke. Due to the wet into wet nature of oil painting I can also utilize how similar values of paint blend into each other to create intermediary values but in doing so I have to remain focused on creating a specific gradation of form. The intermediary values that blending can create are not always the specific values that describe the form. If I do not pay attention to the effect that wet into wet blending is creating I can easily lose a specific gradation of form.
I find it important to reflect on the form consequences of each paint stroke. I have often blended mindlessly and pretty much just blended past the values that I wanted without paying attention. I try to remain conscious of the effect of each added value to the turning of form. With painting it is all a matter of making precise and deliberate decisions. Once paint is on the surface adding more paint continues to build up the surface and can make it more difficult to easily adjust the values of paint. I have found it helpful to preface each brush stroke with the question of whether to turn parts of the form towards or away from the light. Choosing whether to make the stroke lighter or darker. Then I just try to push the form to where I intend it to turn to.


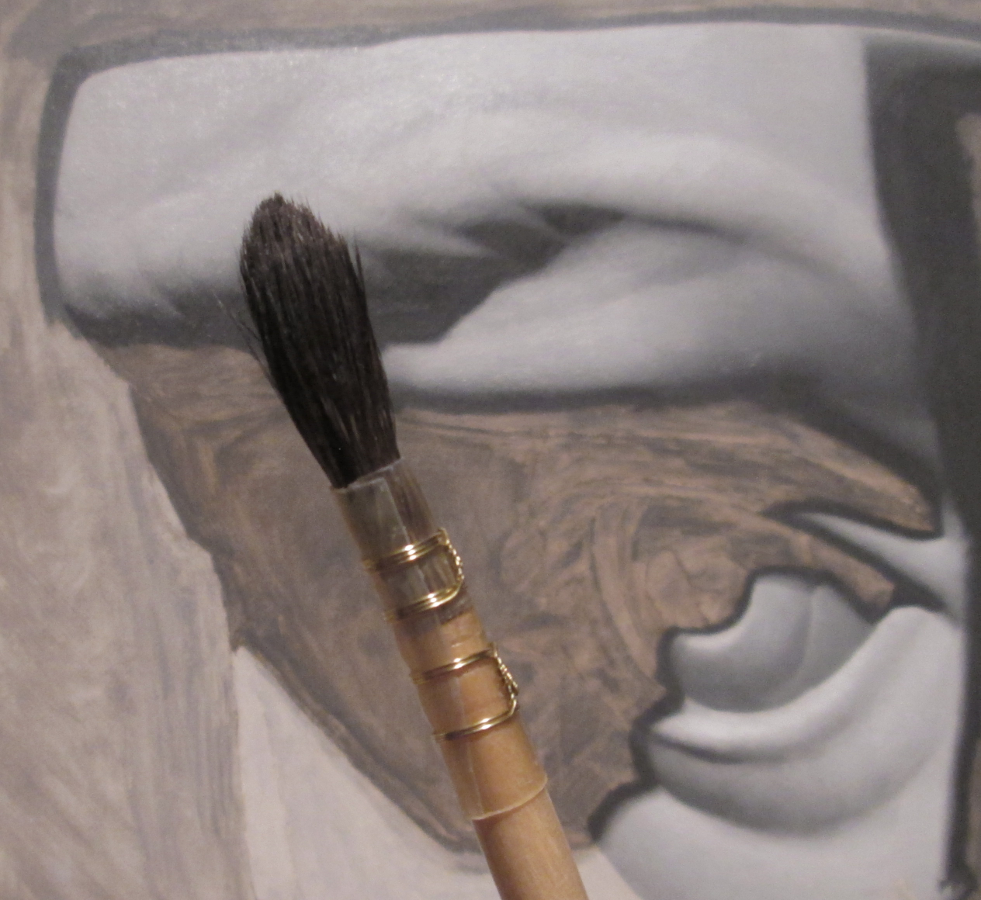
Brushes
I have learned from Devin Cecil-Wishing that brushes can be shaped differently to make it easier to adjust gradations in specific ways. I have mostly been using cheap synthetic oil painting brushes from Blick Art Supplies that can get a sharp point and have substantial spring to assist in controlling each paint stroke or dab of paint.

Pointy brushes can be helpful for adjusting tiny areas of a gradation that require more precise control.

During the modeling process I initially try to place each value of paint in the gradation as specifically as I can and then adjust the form by adding more paint to alter the value. When I find that adding more paint leads to significant building up in the thickness of paint I often use a brush with little or no paint on it to try to bend the values into where I want them to be on the form. Since I still don't have very much control of paint, I have found that changes in adjusting wet paint often requires some back and forth work of adding paint and blending to bend the form to a desired curve.
Paint Use
My teachers have emphasized the importance of using a substantial amount of paint to make it easier to manipulate. I have found that with more paint on the surface I can adjust my gradations while limiting the amount of paint that I am taking off of the surface with my brush while making adjustments. Painting too thinly was a serious issue that I especially struggled with on my first cast painting of the ear. I was painting so thinly that the color of the white ground significantly showed through my painted layer and created a surface that was very uneven. Also, since I did not do an under-painting for my first painting of the ear the value of the white ground was drastically different from the values in the form pass which made the unevenness even worse than if I painted thinly on an under-painting.

I am still struggling with controlling paint but these materials and techniques that I have been learning are helping out. I am striving to create form in paint that suggests very specific curves of form and am still struggling with controlling the evenness of my gradations. I often get distracted by the desire of creating a smooth surface and lose a tactile sensibility to the form modeling. I have found it more helpful to remain focused on gaining a tactile sensation of creating from that I can believe is three dimensional and making the best decisions I can with my painting materials to sculpt the form to that effect. When I am in that state of mind I find that as a result my form modeling becomes smoother by being more specific to the curvature of the form.
Painting Process
Value Study

Underpainting

Underpainting
Reworking

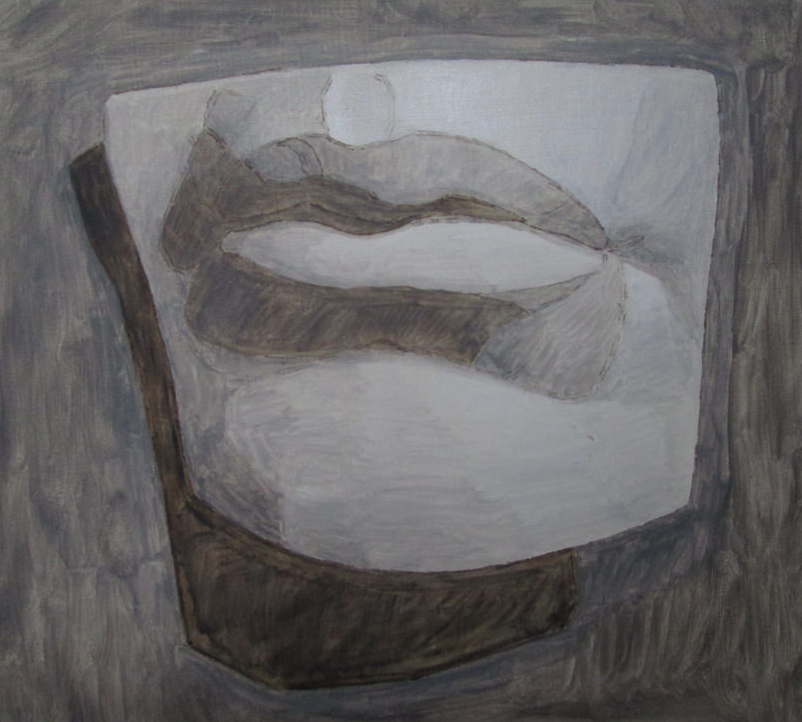
I have been taught to begin the reworking stage by applying a small amount of retouch varnish over the entire painting to bring back the gloss from areas of the painting that have sunken in. When reworking, I add just a bit of Oleogel to my paint to slightly thin my paint where necessary. But in areas that require significant lightening or changes I end up using paint without medium. In areas that require significant changes in reworking, such as the chin, I ended up repainting the entire form to provide a more unified surface quality. I proceeded by selecting a section of form to adjust and tried my best to make decisions based on how I want the form to change as opposed to making rapid decisions based on pure optical judgements of value. By validating my decisions with form analysis I can proceed with the same amount of care in trying to create specific gradations of form as I had in the initial form painting. Being that specificity of form is an important goal for me, I try not to lose that focus while reworking.

I learned a lot while making the cast painting shown above. I have so much more to learn as I progress with my current cast paintings at Grand Central Atelier.


